When it comes to drywall issues, you don’t always need to call Drywall Repair Services to come over to fix the problem. A lot of drywall damage is actually pretty easy to fix all on your own. Not only will you feel like you’ve accomplished something with your own two hands, but you can keep those repair costs in your pocket. That way you can spend your hard-earned money on something more interesting than fixing your drywall.
Don’t worry about your lack of skills either. Patching and repairing drywall is not something that requires years of do-it-yourselfer experience. These are relatively simple fixes that just about anyone can perform without professional assistance. However, if you feel unsure about your confidence level and would rather call in the experts, by all means go ahead.
There are many types of damage that can occur to drywall in just about any home. Here are some of the most common problems you may find yourself facing at some point.
Fixing Small Dents
It happens, especially in homes with young kids. They can be rough on your walls and you’ll want to know how to repair any damage that occurs. When it’s the small stuff like a dent, a small hole, or some kind of ding that is affecting the appearance of your drywall, you can fix something like this in no time.
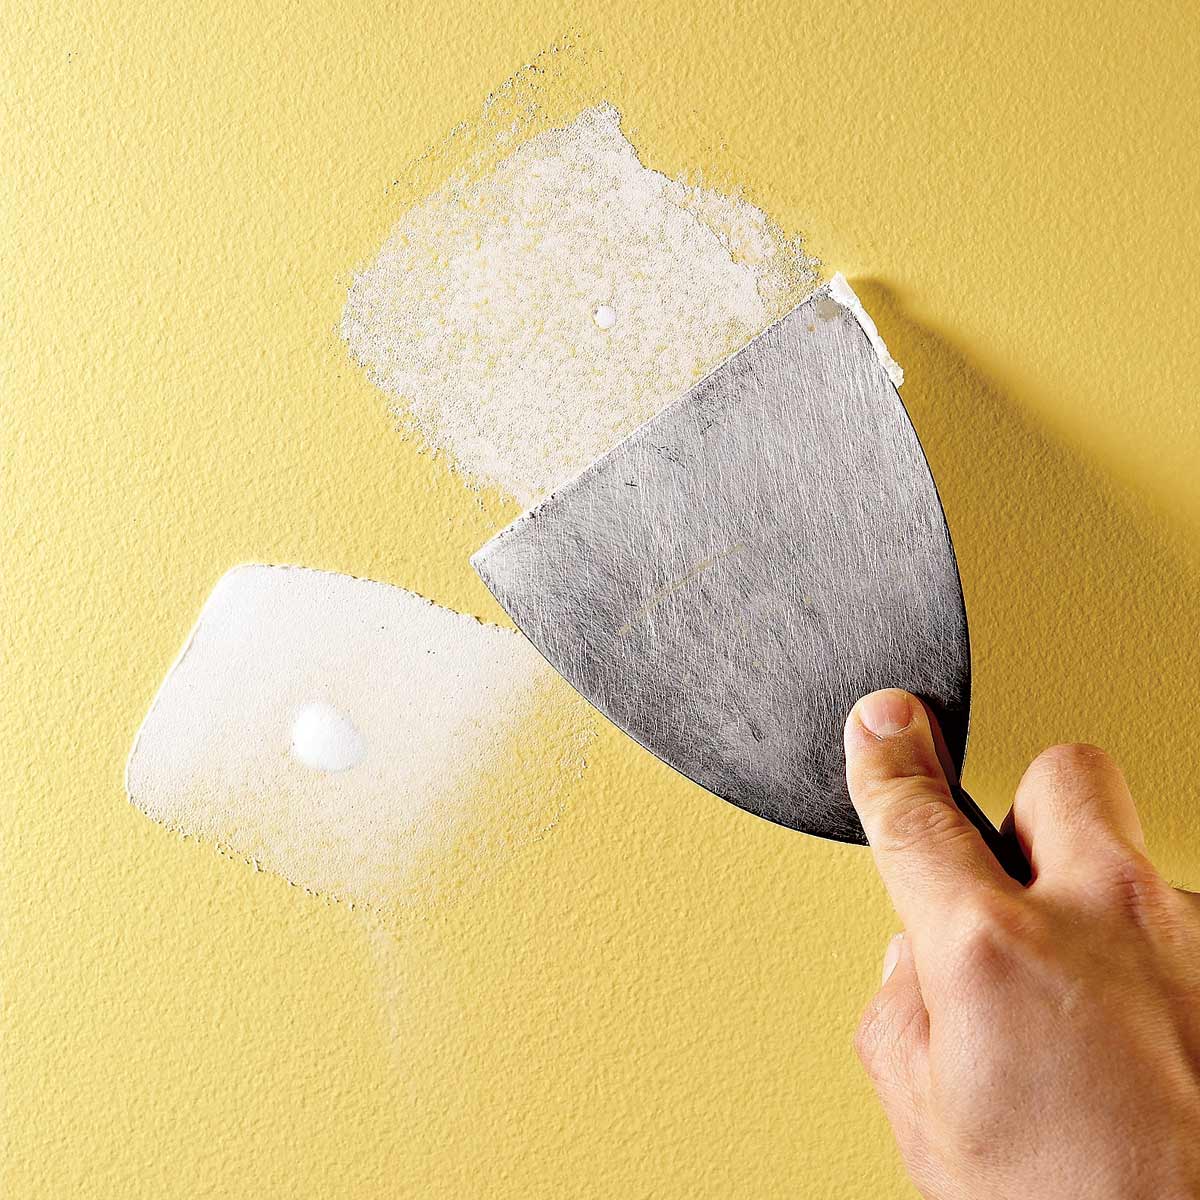
First off, clear away any loose drywall or chipped paint or whatever might be hanging around near the damage. Apply some spackle over the hole or the dent and spread it level with the surface. Give it about a day or so and then sand the area down so it appears smooth.
Fixing Small Holes

Small holes are no big deal. We’re talking about anything that’s the size of a doorknob or a small fist. Who knows why the hole is there, but it is and now you need to patch it up fast. Most common patch kits are suitable for the job.
Just apply the self-adhesive mesh patch on top of the affected area. Then get your drywall knife to spread the compound or spackle over the mesh patch. Take your time doing this, you want it to blend with the wall as seamlessly as possible. That will require you to do a little light feathering along the perimeter to blend it well with the surrounding areas of the wall.
Feathering is pretty simple to do, just place pressure on the compound with your knife at an angle and spread away from the edges of the patch until it thins out. Once you’re done, allow the area to dry thoroughly before applying a second coat if necessary. Sand the area to make sure it blends in seamlessly and you’re ready to paint or leave it as is. That all depends on the overall aesthetic and color of the wall.
Medium And Larger Holes
In the case of a bigger issue with damage to your drywall, you’re going to take similar steps in that you are going to need to cover the hole with something and apply joint compound over the repair. Remember, the goal here is to bring the surface of the wall level.
You’re going to need some excess drywall that you can cut into the proper size and shape to cover the damage. Make sure you cut a square about two inches larger all around. Score the back of the drywall with a blade about an inch in from each side of the square.
Next, break off the gypsum but don’t touch the paper backing. Leave that where it is and don’t break it. Now place your patch over the damaged area and trace around the square of gypsum. You don’t need to incorporate the paper border into your trace. When you’re done, cut out the tracing you made with a drywall knife.
Get your compound and apply it to the back of the paper border on your gypsum and place it into the new hole you just cut out in your drywall, pressing the paper edges into the space along the edge of the hole that you cut. Once your patch is seated firmly in the hole, cover it all with more compound and feather the edges as normal.
Based on the size of your patch and the extent of the damage, you might want to give it a second coat of compound after the first dries completely. Be sure to feather the edges of your second coat so that it all blends into the wall.